Before using the Cloud Print API, you must register the integration in the Loftware Cloud Developer Portal.
To do this:
- Register the Cloud Integration
- Go to the Loftware Cloud Developer Portal, register your Label Cloud account with the Cloud Print API or Cloud Trigger API. This step links your account to the API.
- Follow this guide to create the cloud integration: Cloud Print API.
- Get Your Subscription Key
- After registration, you’ll receive a Subscription Key. This key authorises you to make API calls and connect with Business Central system.
- Follow these steps to find the key:
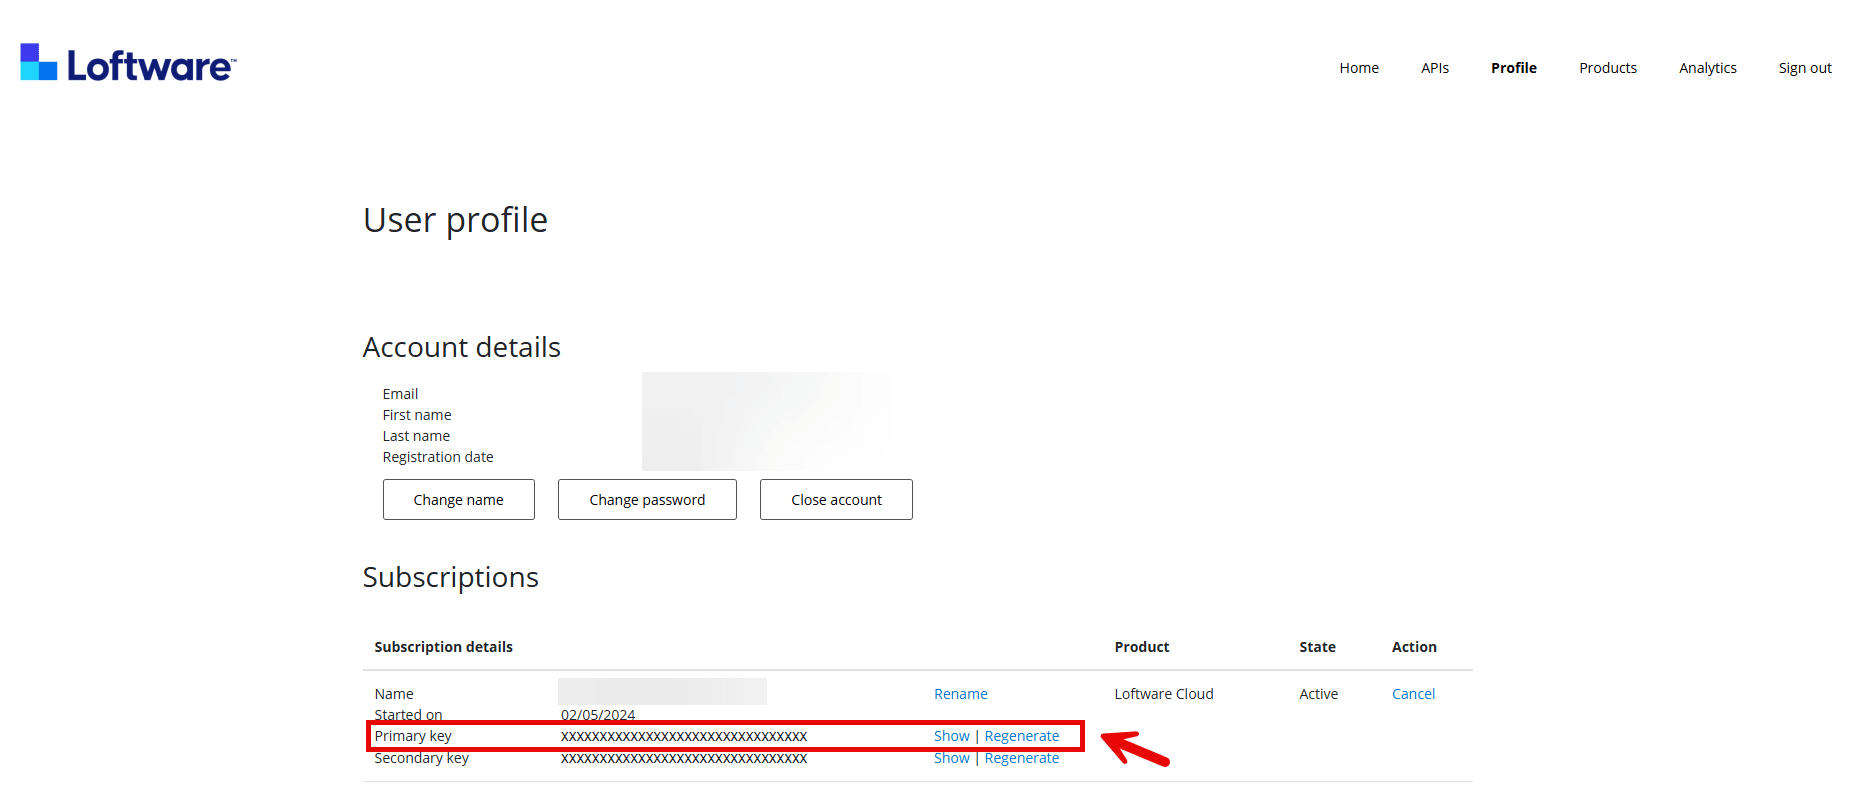
- Open and log into the Loftware Developer Portal.
- Open the Profile page.
- Under the Subscriptions tab, locate the Primary Key field of the subscription.
- Click on the Show button.
- Copy and save this key for use in later setup.
Understanding the Loftware Cloud printer types
The Cloud Print API printer integration supports both Cloud Printers and Print Queues. This section helps you to understand the difference of the two printer types:
- CloudPrinter: These are printers equipped with cloud printing features and can be connected directly to Loftware Cloud without installing the local printer drivers.
As of April 2025, the following printer models are supported:- Zebra printers with Link-OS printer operating system
- SATO CLNX series
- Epson CW series printers.
- See the full list of supported printers here.
- PrintQueue: These printers to other printers that are network-based and connected to a workstation. If you don’t see your label printer in the Cloud Printer supported list, use the Print Queue type.
To learn more about each printer type, check out this article: Loftware Cloud – Cloud Print API
Managing printers on the Loftware Cloud Control Center
To set up your Cloud Printers and Print Queues, please follow these user guides:
Adding subscription key in Business Central
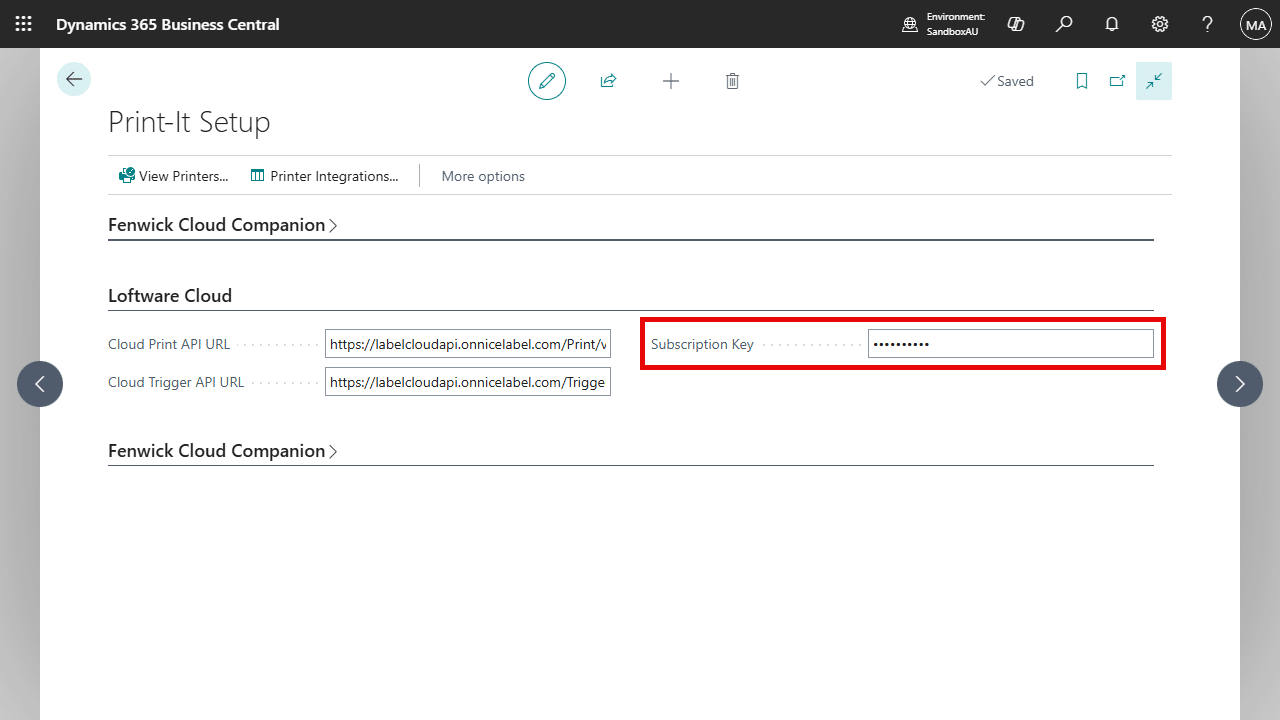
- Search and open Print-It Setup page.
- Under the Loftware Cloud tab, paste the copied primary key into Subscription Key field.
- Save your changes.
Creating printer integration in Business Central
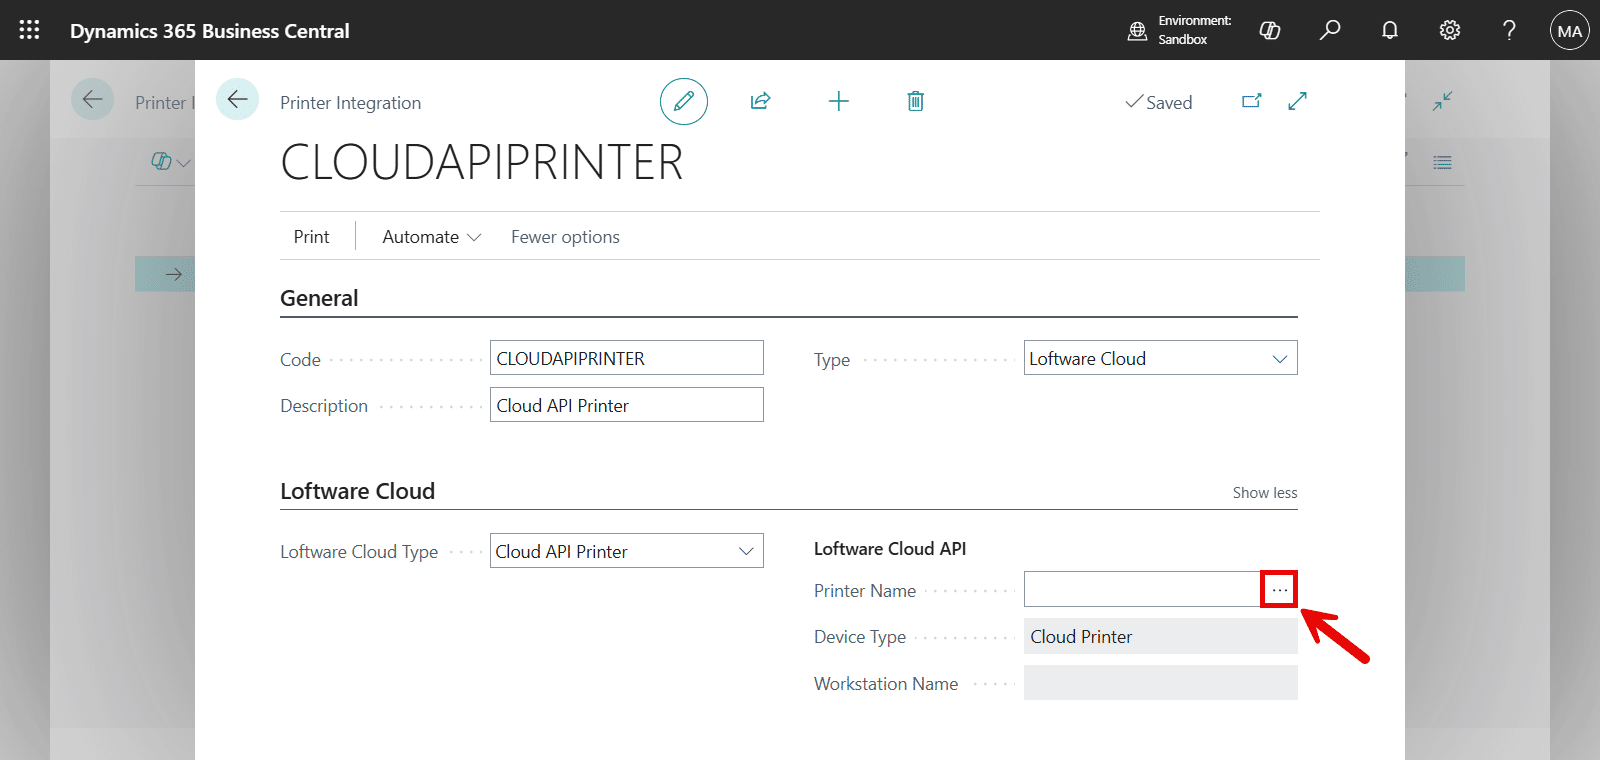
- Search and open Printer Integrations page.
- Create a new Printer Integration.
- Enter a Code and Description,
- On the Type drop-down field, choose “Loftware Cloud” and the Loftware Cloud tab will appear on the screen,
- On the Loftware Cloud Type dropdown, choose Cloud API Printer,
- Use the lookup button on the Printer Name field,
- A dialog will open and display all printers connected to your Loftware Cloud instance. Select a printer from the list.
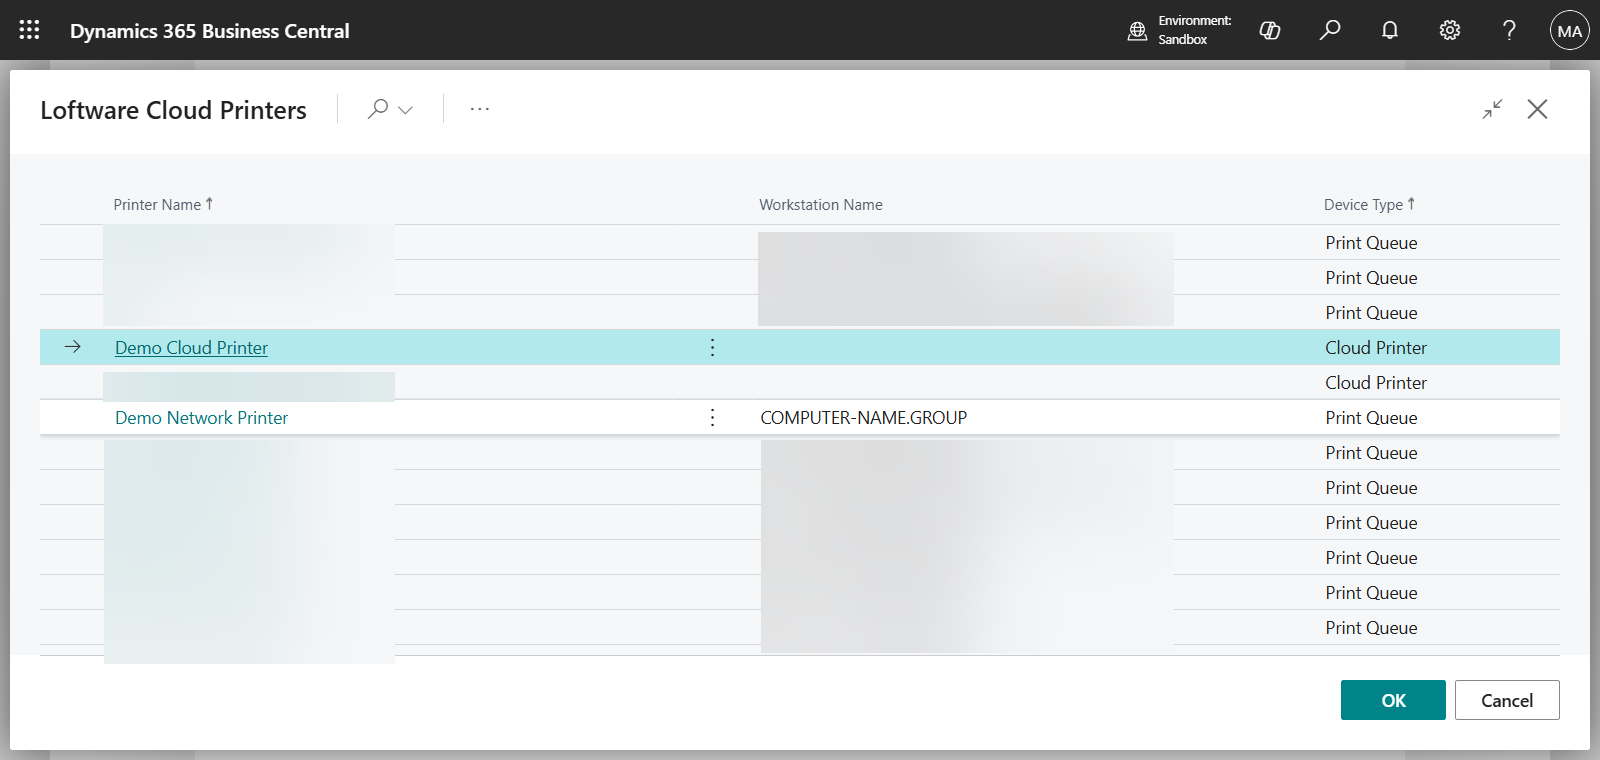
- For the Cloud Printers, the Workstation Name is blank because this printer type is not connected to a local server or a workstation. This field only applies to Printer Queues.
- For the Cloud Printers, the Workstation Name is blank because this printer type is not connected to a local server or a workstation. This field only applies to Printer Queues.
- You have now successfully linked the Loftware Cloud printer.
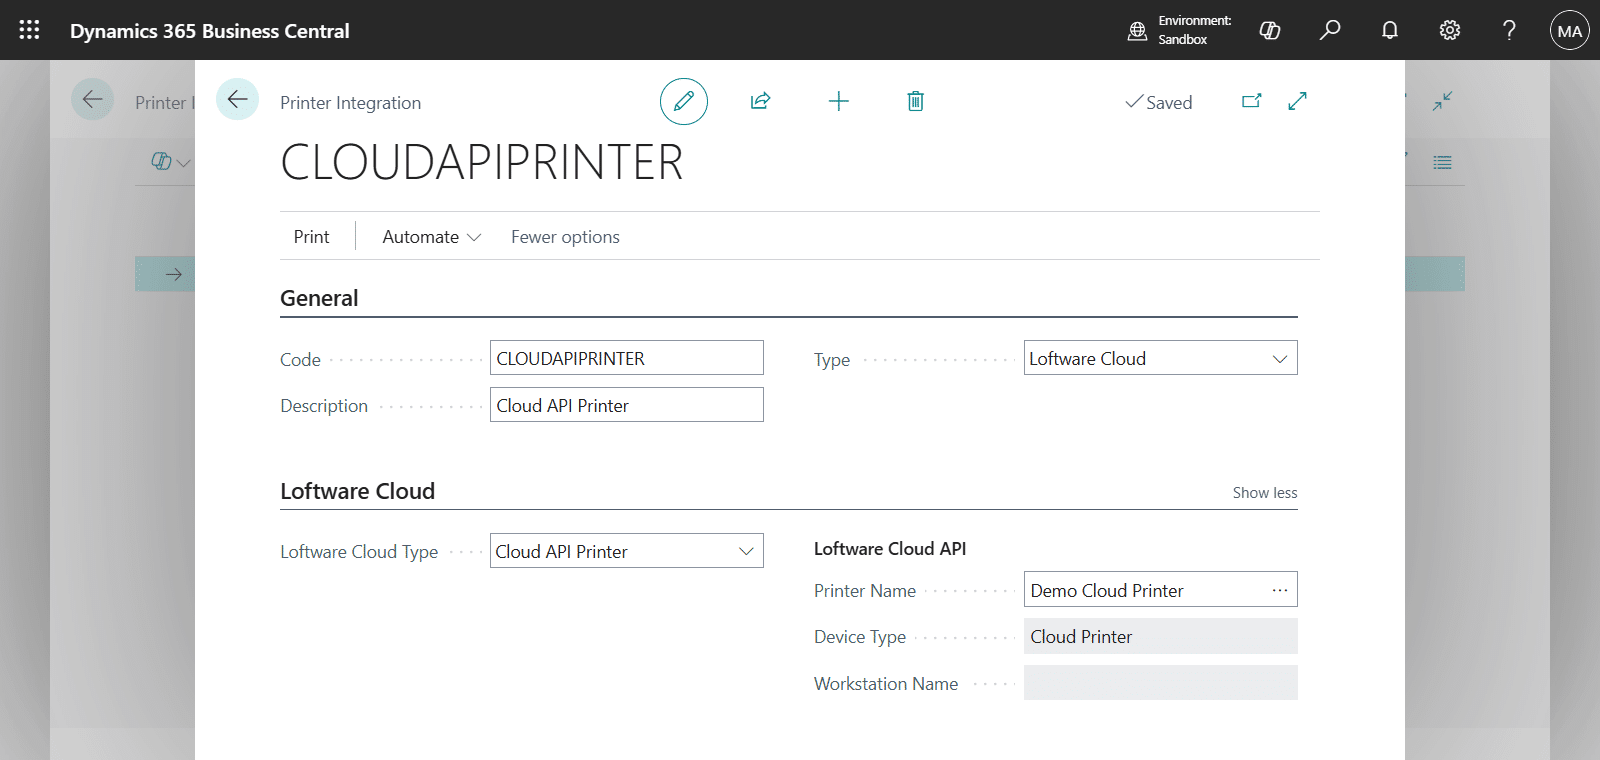
| Field | Description |
|---|---|
| Printer Name | Specifies the name defined in the Loftware Cloud Control Center for the registered printer. |
| Device Type | Select “Show more” to view this field on the Printer Integration card. This field is not editable. Specifies the device type of the printer. Cloud Printer refers to printers with built-in cloud printing capabilities. Print Queue refers to other network printers. |
| Workstation Name | Select “Show more” to view this field on the Printer Integration card. This field is not editable and only applies to the Print Queue type. Specifies the name of the workstation where the printer is installed. |